1. Getting Started
LUCA BDS is a web-based advanced analytics platform that enables organizations to turn their data into valuable information for strategic decision-making. Being a web application, it can be accessed from any device with a browser installed, simply by entering the URL of the corresponding instance.
Access to LUCA is protected by authentication. To log in, the user must enter their username and password on the login page.
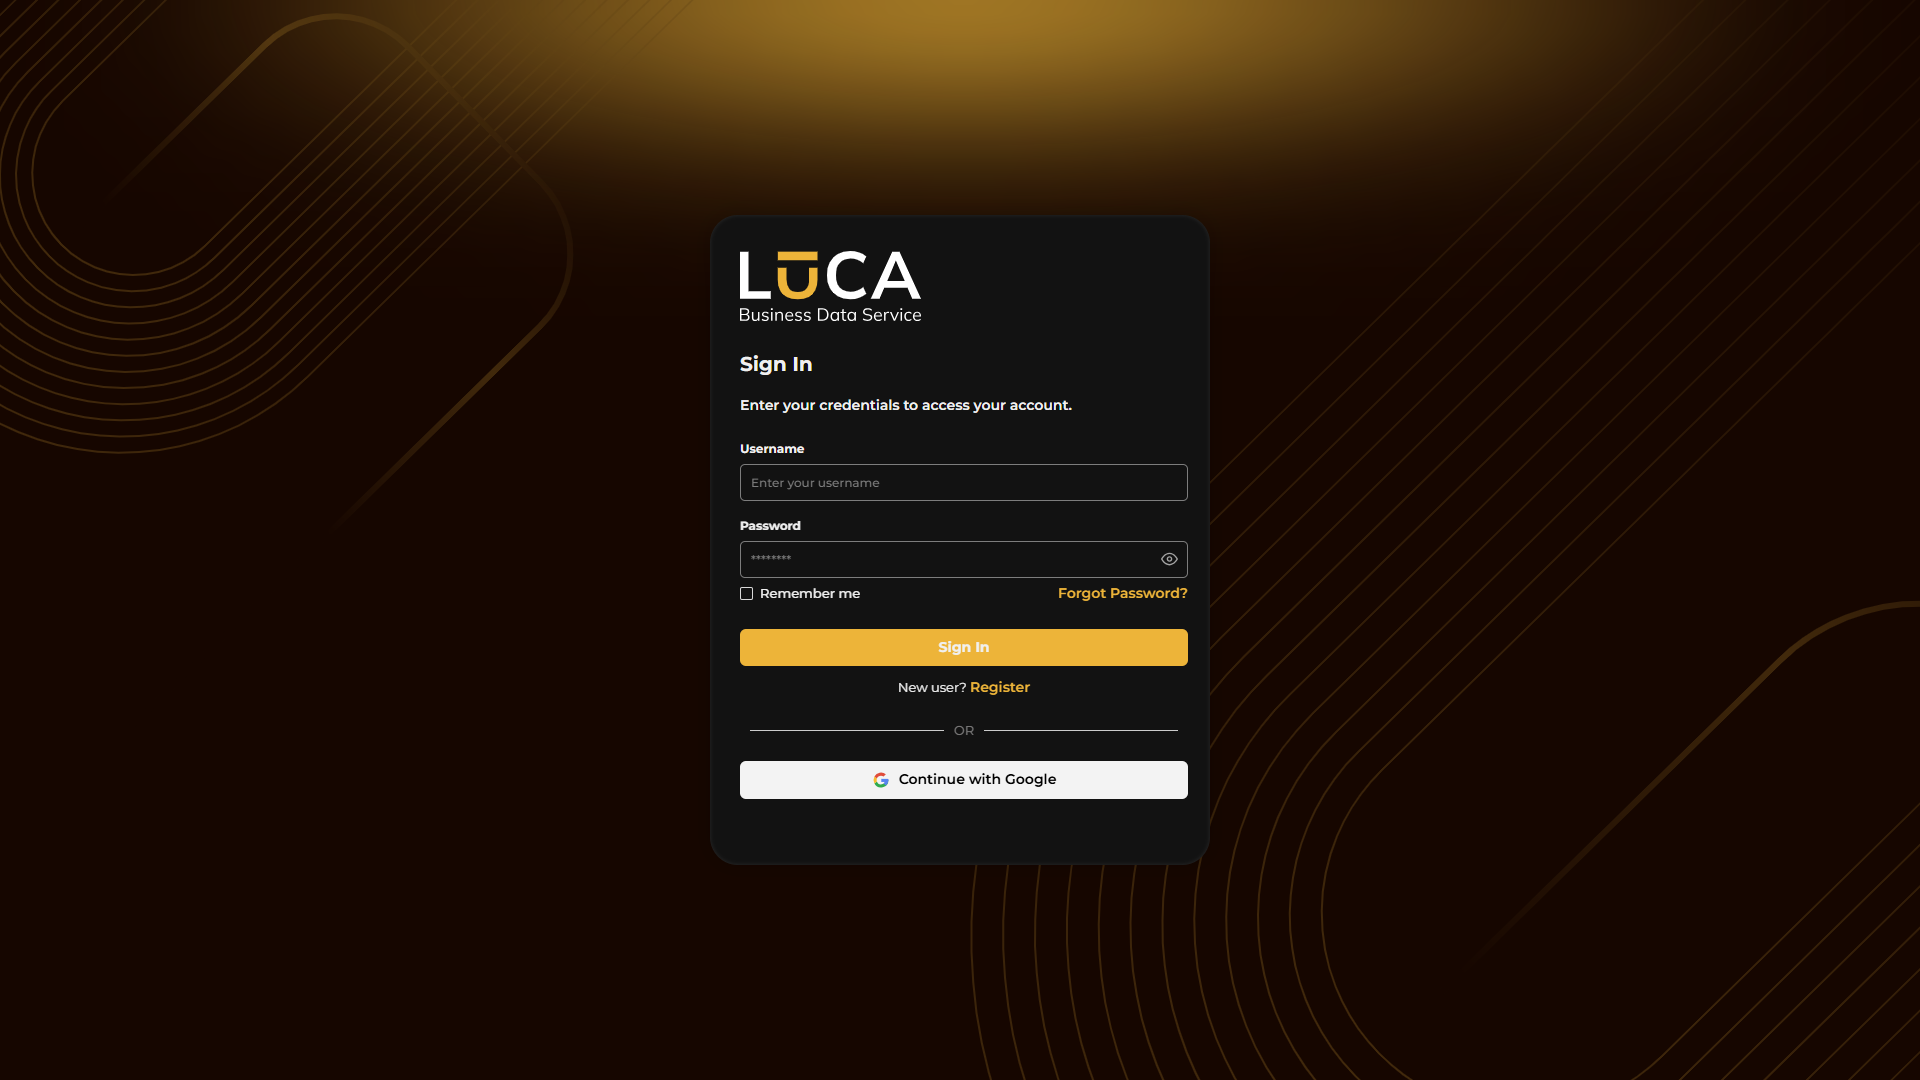 Figure 1.1: Login
Home Screen
Once logged in, the home screen will be displayed. This screen is organized into the following sections:
Applications: This section displays the applications that the user has access to, with a summary of the number of dashboards, datasources, and queries for each. It includes a search tool to quickly locate applications. Summary: Presents a count of the user's own elements: queries, forms, dashboards, email reports, trees, charts, applications, and chats. Quick Access: Offers shortcuts for creating the most common elements: datasources, queries, charts, dashboards, trees, and chats. Help and Resources: Contains support links, access to the website, and a manual guide for accessing the most relevant modules.
On the left side is the navigation menu, from which all LUCA modules can be accessed: Queries, Trees, Forms, Charts, Dashboards, Applications, Email Reports, Chats, Datasources, and Flows. The menu is collapsed by default.
A user without editing permissions will only see the application panel for which they have been assigned access and, in the left navigation menu, only the home button.
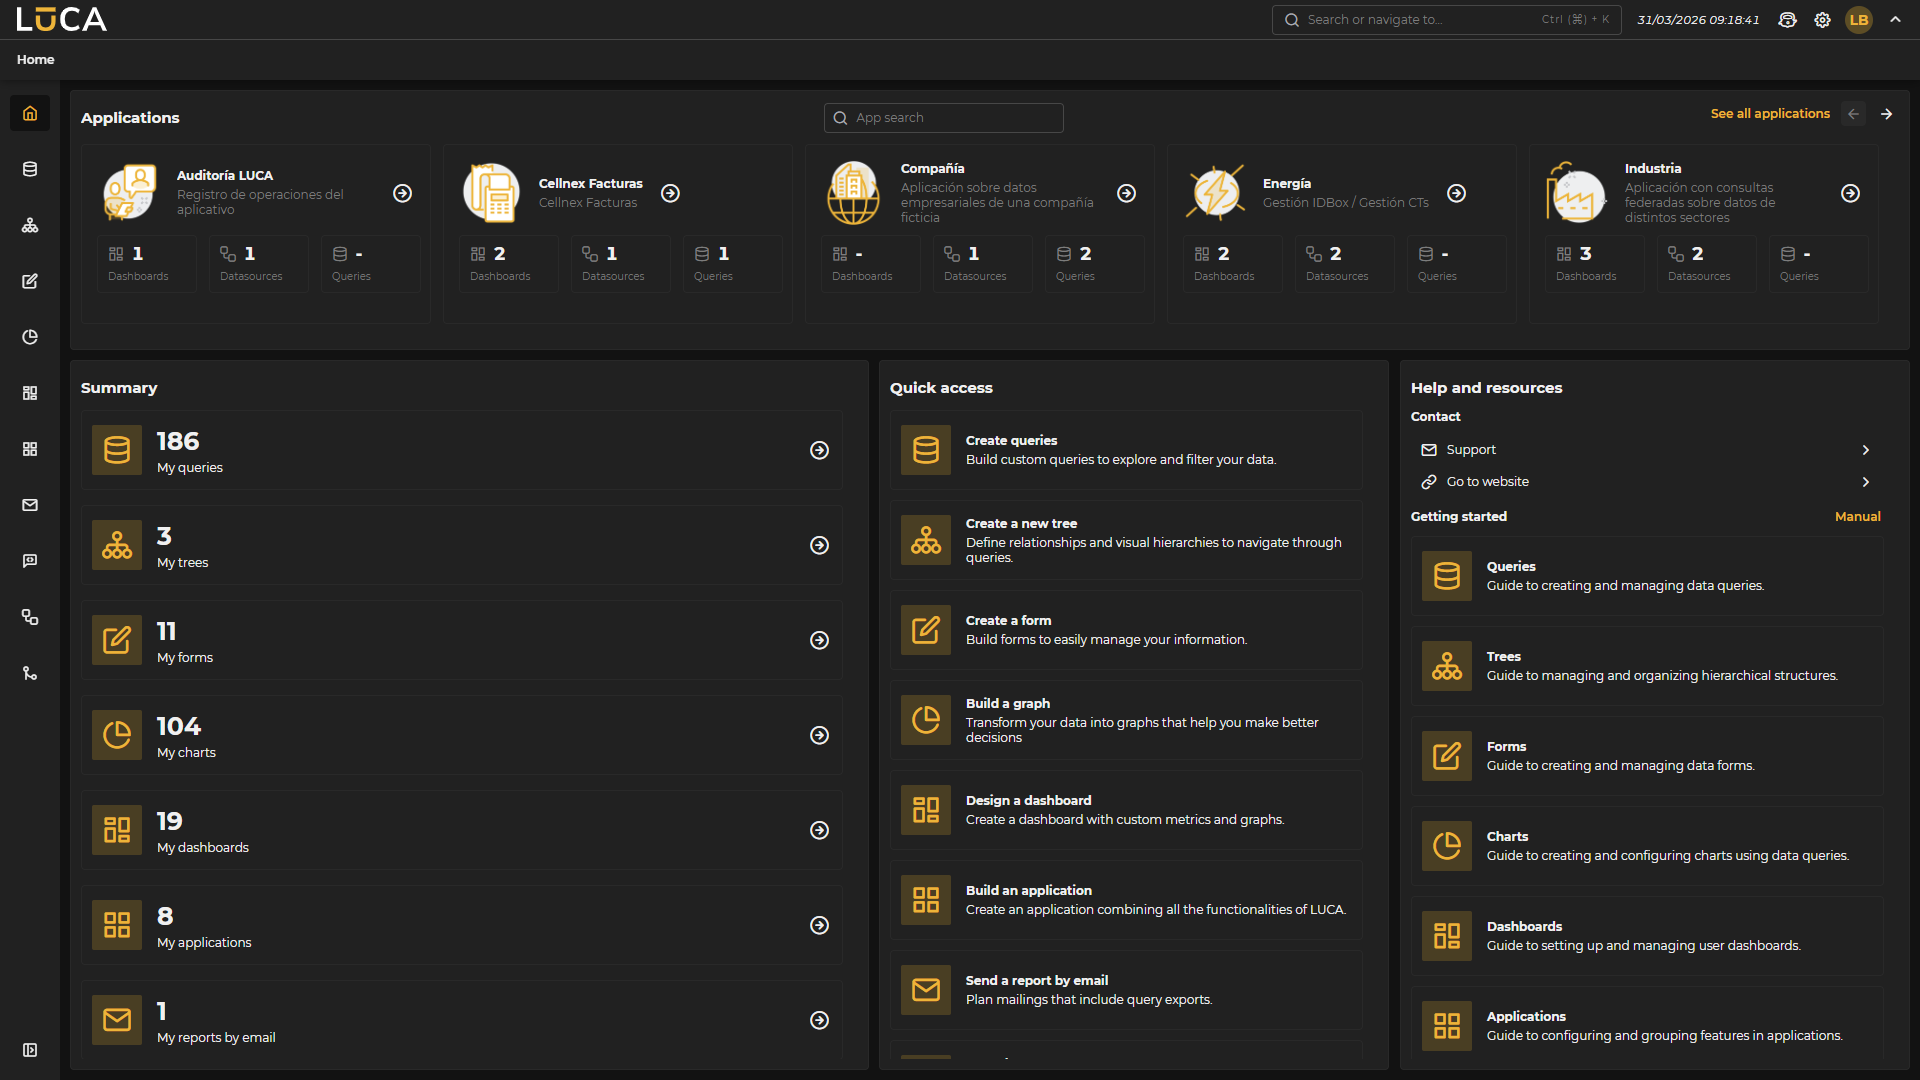 Figure 1.2: Home
The top navigation bar is present on all LUCA screens and contains the following elements, from left to right:
Search Bar: Allows searching or navigating through any LUCA element. It can be activated with the keyboard shortcut Ctrl+K. When opened, predefined shortcuts are displayed, grouped into two sections:
- Application Menu: direct access to Datasources.
- Quick Access: links to API Docs, Licenses, Log Out, Manual, Profile, Keyboard Shortcuts, and System Settings.
Date and Time: Displays the current system date and time.
LUCA Expert Chat: Direct access to the AI chat powered by the LUCA manual, which acts as an expert answering questions about the application’s operation. For more information, please refer to the Models section.
Settings: Expands a menu with the following options:
- API Docs: LUCA API documentation.
- Manual: access to this manual.
- System Settings: general adjustments of the platform.
- Shortcuts: list of available keyboard shortcuts.
Connected User: Displays the name of the authenticated user. Expands a menu with the following options:
- User Info: shows the name and the user of the authenticated profile.
- Profile: allows updating profile data, changing the password (if permitted), and selecting the theme of the interface (light or dark). For more information, please refer to the My Profile section.
- Log Out: ends the current session.
Arrow Button: Button to show or hide the breadcrumb

Figure 1.3: User Menu
My Profile
To access the user's profile, click on the Profile button that appears in the context menu when hovering over the connected user icon in the top bar.
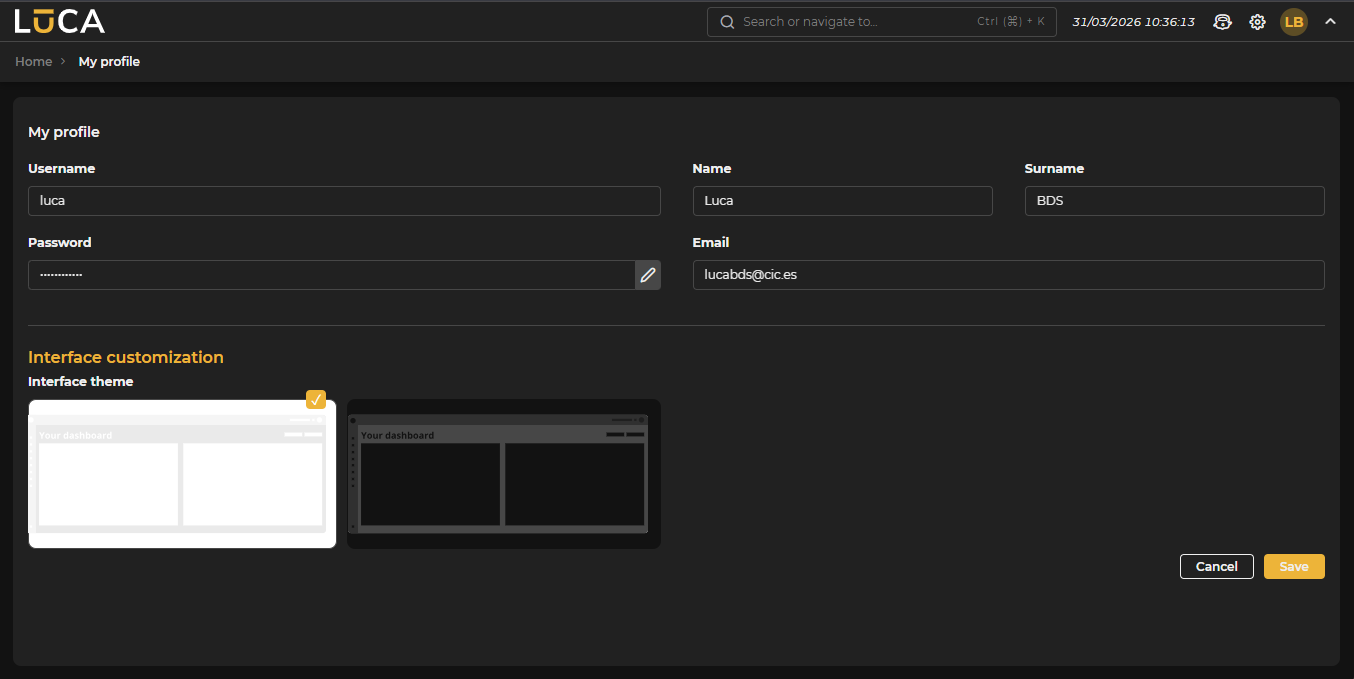 Figure 1.4: My Profile
The profile screen is divided into two sections:
My Profile: Displays and allows editing of the user's basic data: Username, First Name, Last Name, Password, and Email. The password field is only editable if the user type permits it.
Interface Customization: Allows selecting the interface theme between two options: light theme and dark theme. The currently active theme appears marked with a selection indicator.
To apply any changes, the Save button must be clicked. The Cancel button discards changes and restores previous values.
System Configuration
Users with configuration permissions in LUCA can access this section from the context menu, which appears when hovering over the settings icon. If the user has the appropriate permissions, the System Settings option is visible.
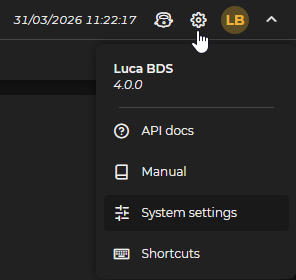
Figure 1.5: System Configuration Access Menu
The configuration screen is organized into two groups accessible from the left side panel:
SYSTEM: Global parameters of the platform, grouped into three sections: Preferences, AI Server, and License. PERMISSIONS: Management of Groups, Profiles, Roles, and Users.
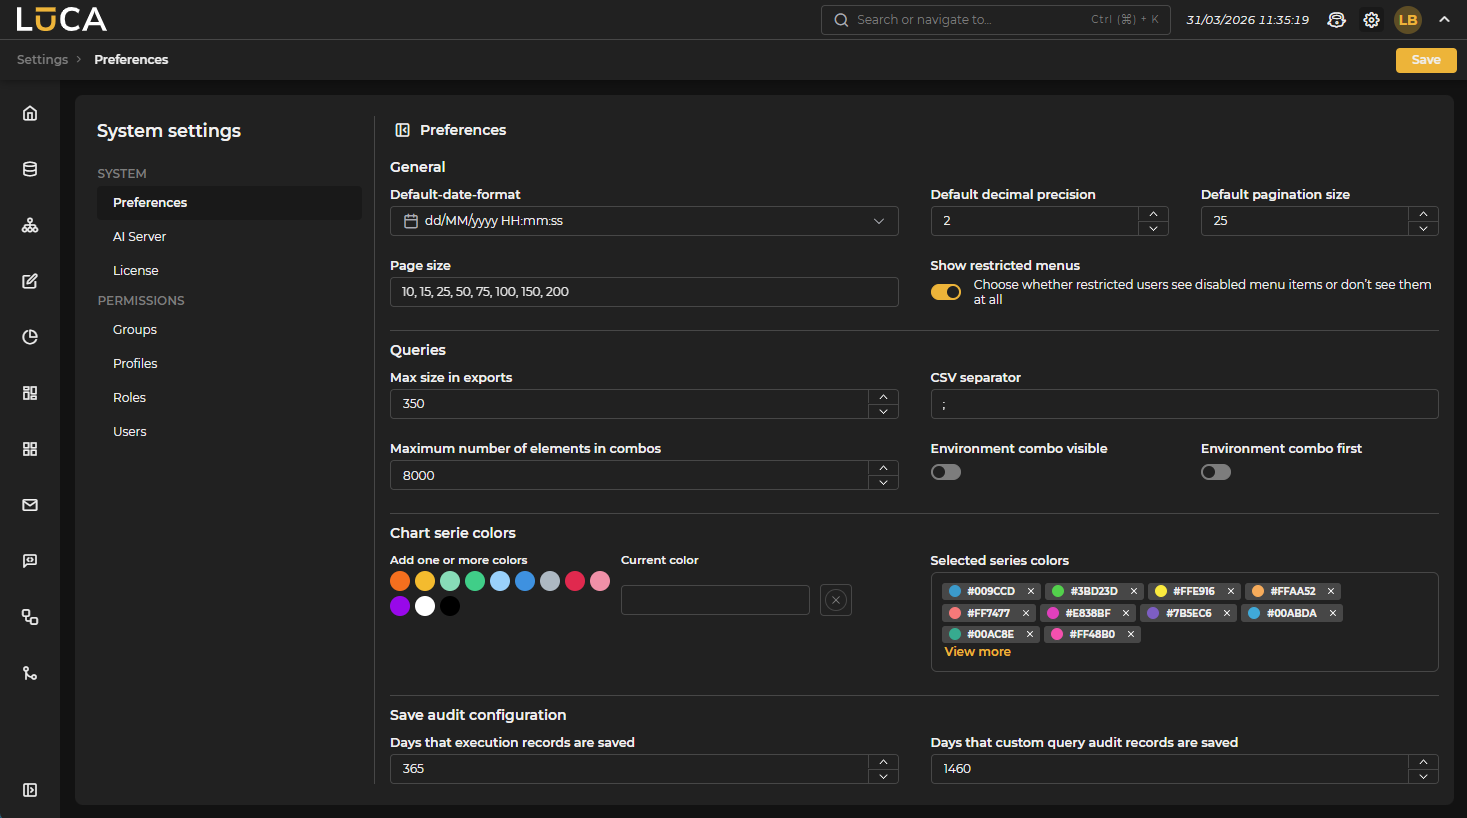 Figure 1.6: System Configuration — Preferences
Preferences
The Preferences section groups the general parameters that affect the behavior of the entire platform. It is divided into four blocks:
General Allows configuring default values for the application:
- Default date format: format in which dates are displayed throughout the platform. The default value is
dd/MM/yyyy HH:mm:ss. - Default decimal precision: number of decimal places displayed for numeric values.
- Default pagination size: number of rows displayed per page in listings.
- Pagination sizes: list of available sizes for the pagination selector, separated by commas.
- Show restricted menus: controls whether users without permissions for a menu item see it disabled or do not see it at all.
Queries Parameters affecting the behavior of queries:
- Maximum export size: maximum number of rows that can be exported.
- CSV separator: character used as a separator in CSV exports.
- Maximum number of items in combo boxes: limit of items loaded in selection combo boxes.
- Visible environment combo: activates or deactivates the visibility of the environment selector in the navigation bar.
- Environment combo first: when activated, shows the environment selector before other filters.
Series Colors Allows customizing the default color palette used in charts. Colors can be added using the color selector or by entering the hexadecimal value directly.
Audit data settings
- Days to keep query execution logs: number of days to retain execution logs in the database.
- Days to keep logs of custom query audits: number of days to retain detailed audit logs.
AI Server
The AI Server section allows registering external servers on which private artificial intelligence models will be deployed. These servers are necessary for creating models in the Models > Deployments section.
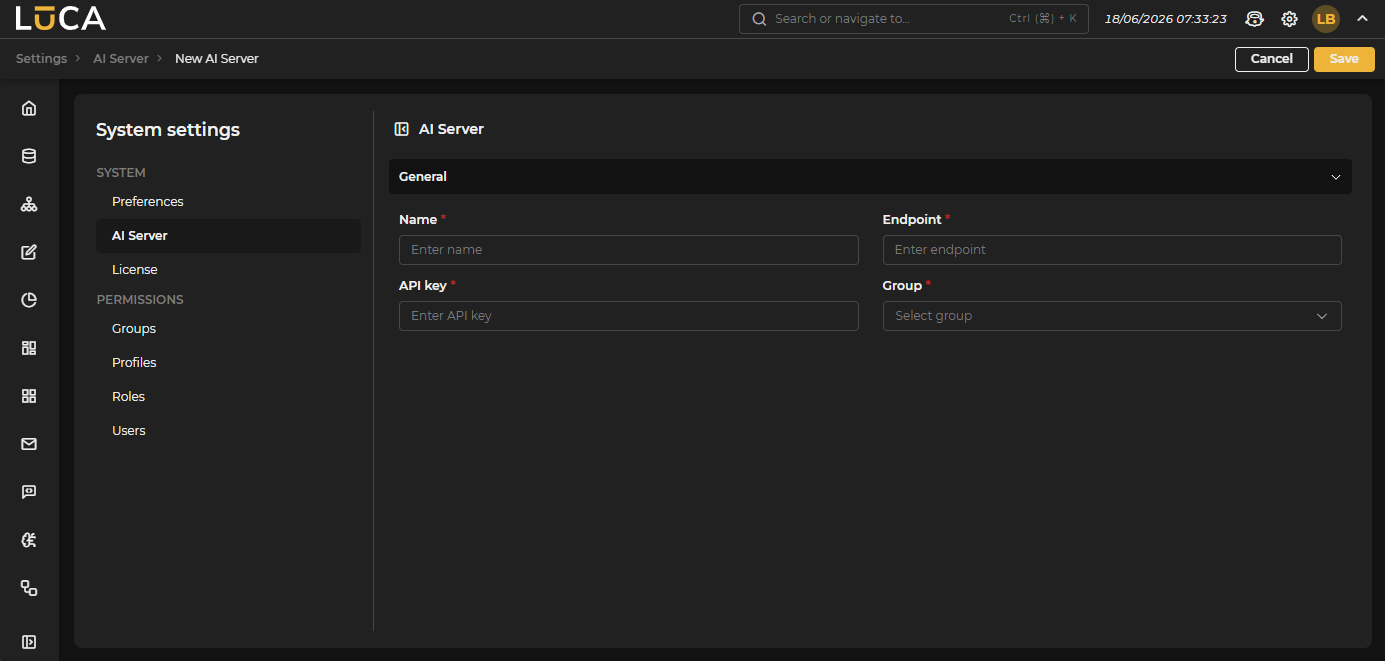 Figure 1.7: AI Server
To add a server, fill out the form with its connection details, and once saved, it will be available in the Server dropdown of the model creation form.
License
The License section displays the status of the active license and allows updating it.
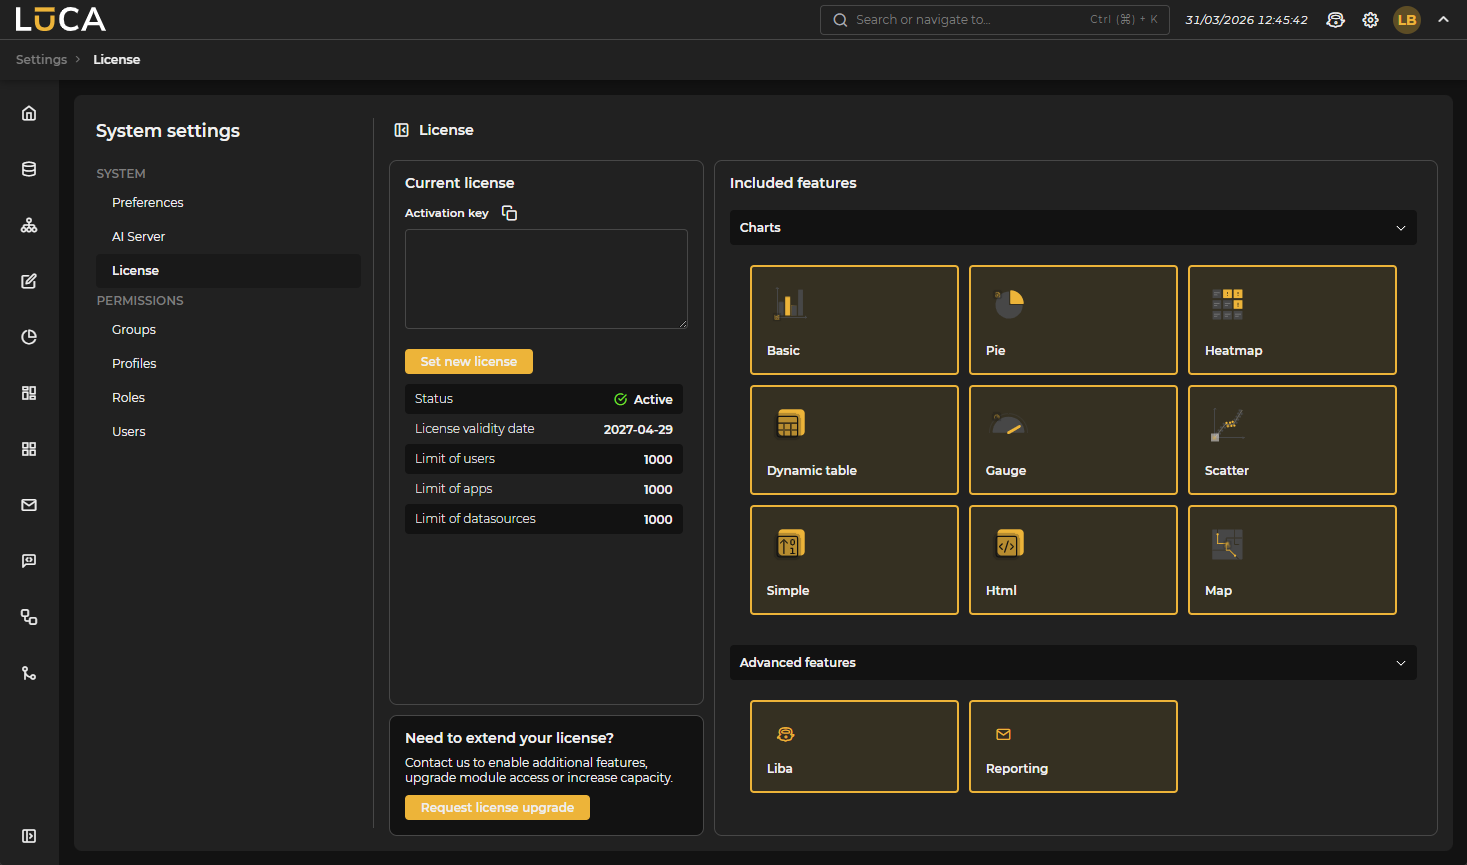 Figure 1.8: License
The screen is divided into two areas:
Left Panel Contains the Activation Key field, where the text of the new license is entered, and the Update License button, which validates and installs the entered key. Under the button, a summary of the currently installed license is displayed, with the following fields:
- Status: indicates if the license is active or has expired.
- Validity Date: date until which the license is valid.
- User Limit: maximum number of permitted users.
- Application Limit: maximum number of permitted applications.
- Connection Data Limit: maximum number of permitted datasources.
If it is necessary to upgrade the license, the Request License Upgrade button opens the system's mail client with a predefined message addressed to the support team.
Right Panel Displays the functionalities included in the license, organized into cards. Clicking on a card provides a brief summary of the functionality and indicates whether it is active in the current license. Functionalities are grouped into two blocks: Charts and Advanced Features.
Permissions
The PERMISSIONS group in the side panel manages the four elements that control user access to LUCA: Groups, Profiles, Roles, and Users.
Groups
Groups are the folders where LUCA elements are stored: queries, trees, forms, charts, dashboards, and applications. They have a hierarchical structure that allows organizing the instance's content. For a user to execute or edit an element of a group, they must have permissions for it.
 Figure 1.9: New Group
To create a group, the Name, Description, and Parent Group fields must be filled out. From the Users panel of the same form, users can be directly assigned to the group, also indicating if they have editing permission: with this permission, the user can create and modify elements of the group; without it, they can only execute them.
Assigning editing permission for a group determines whether the user can modify the elements it contains or only execute them.
Profiles
Profiles are the quickest and most recommended way to manage user permissions. They allow assigning multiple users access to datasources, groups, and applications, and granting the necessary roles for them to perform desired actions.
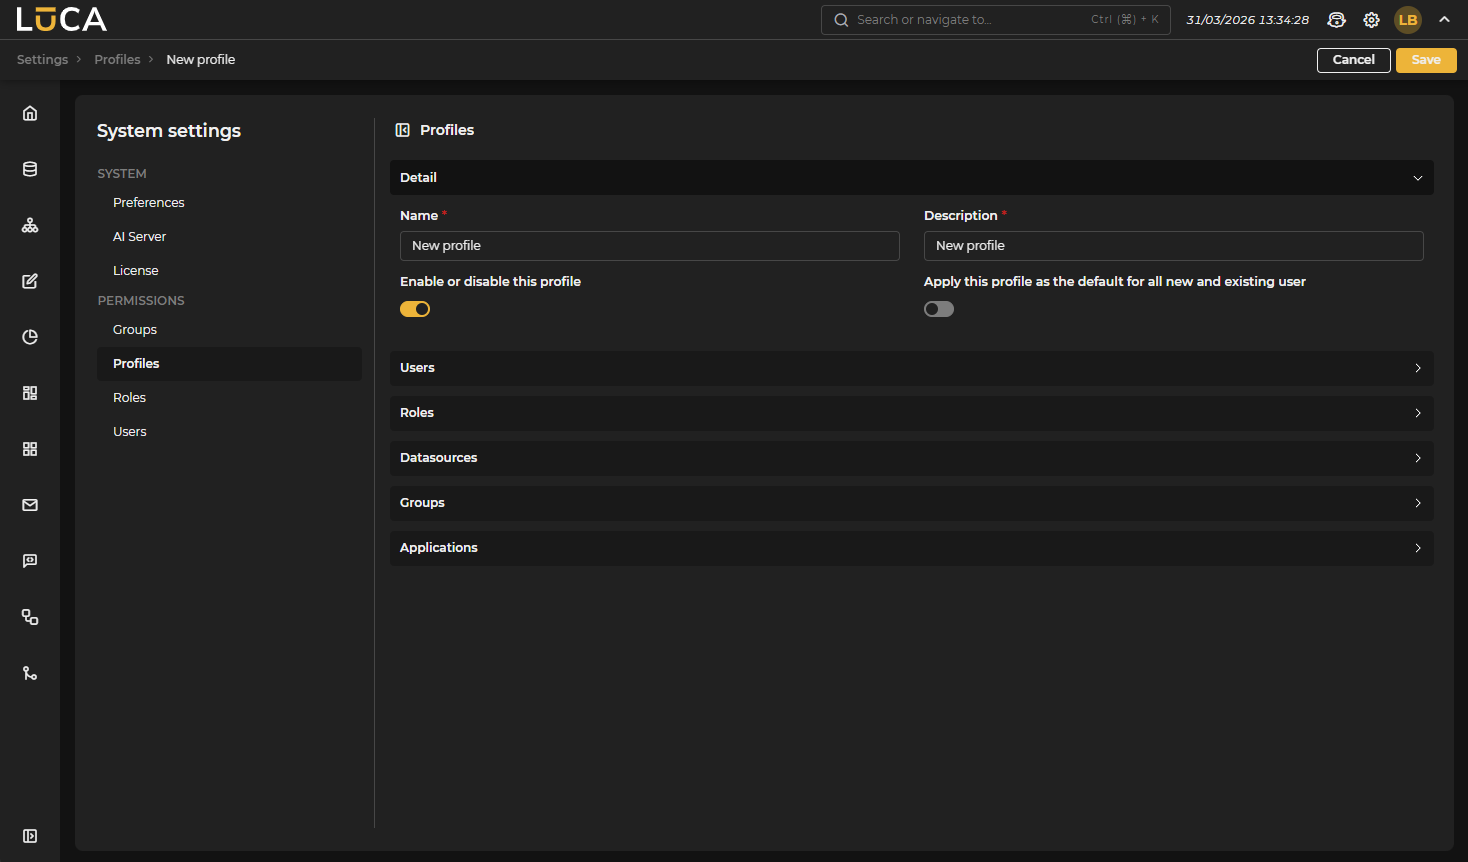 Figure 1.10: New Profile
The creation form includes the Name and Description fields, plus two options:
- Activate or deactivate this profile: a deactivated profile nullifies all permissions it grants.
- Apply this profile as default for all new and existing users: all users automatically inherit the permissions of this profile without needing to assign it individually.
The sections Users, Roles, Datasources, Groups, and Applications allow configuring what is assigned to the profile.
It is a good practice to create a profile for each application, assigning it the necessary datasources, groups, and roles. This way, to grant a user access to an application, it is enough to include them in the corresponding profile.
Roles
Roles are groupings of permissions. Each permission corresponds to a specific action that can be performed in LUCA: create, edit, delete, or execute elements from different modules.
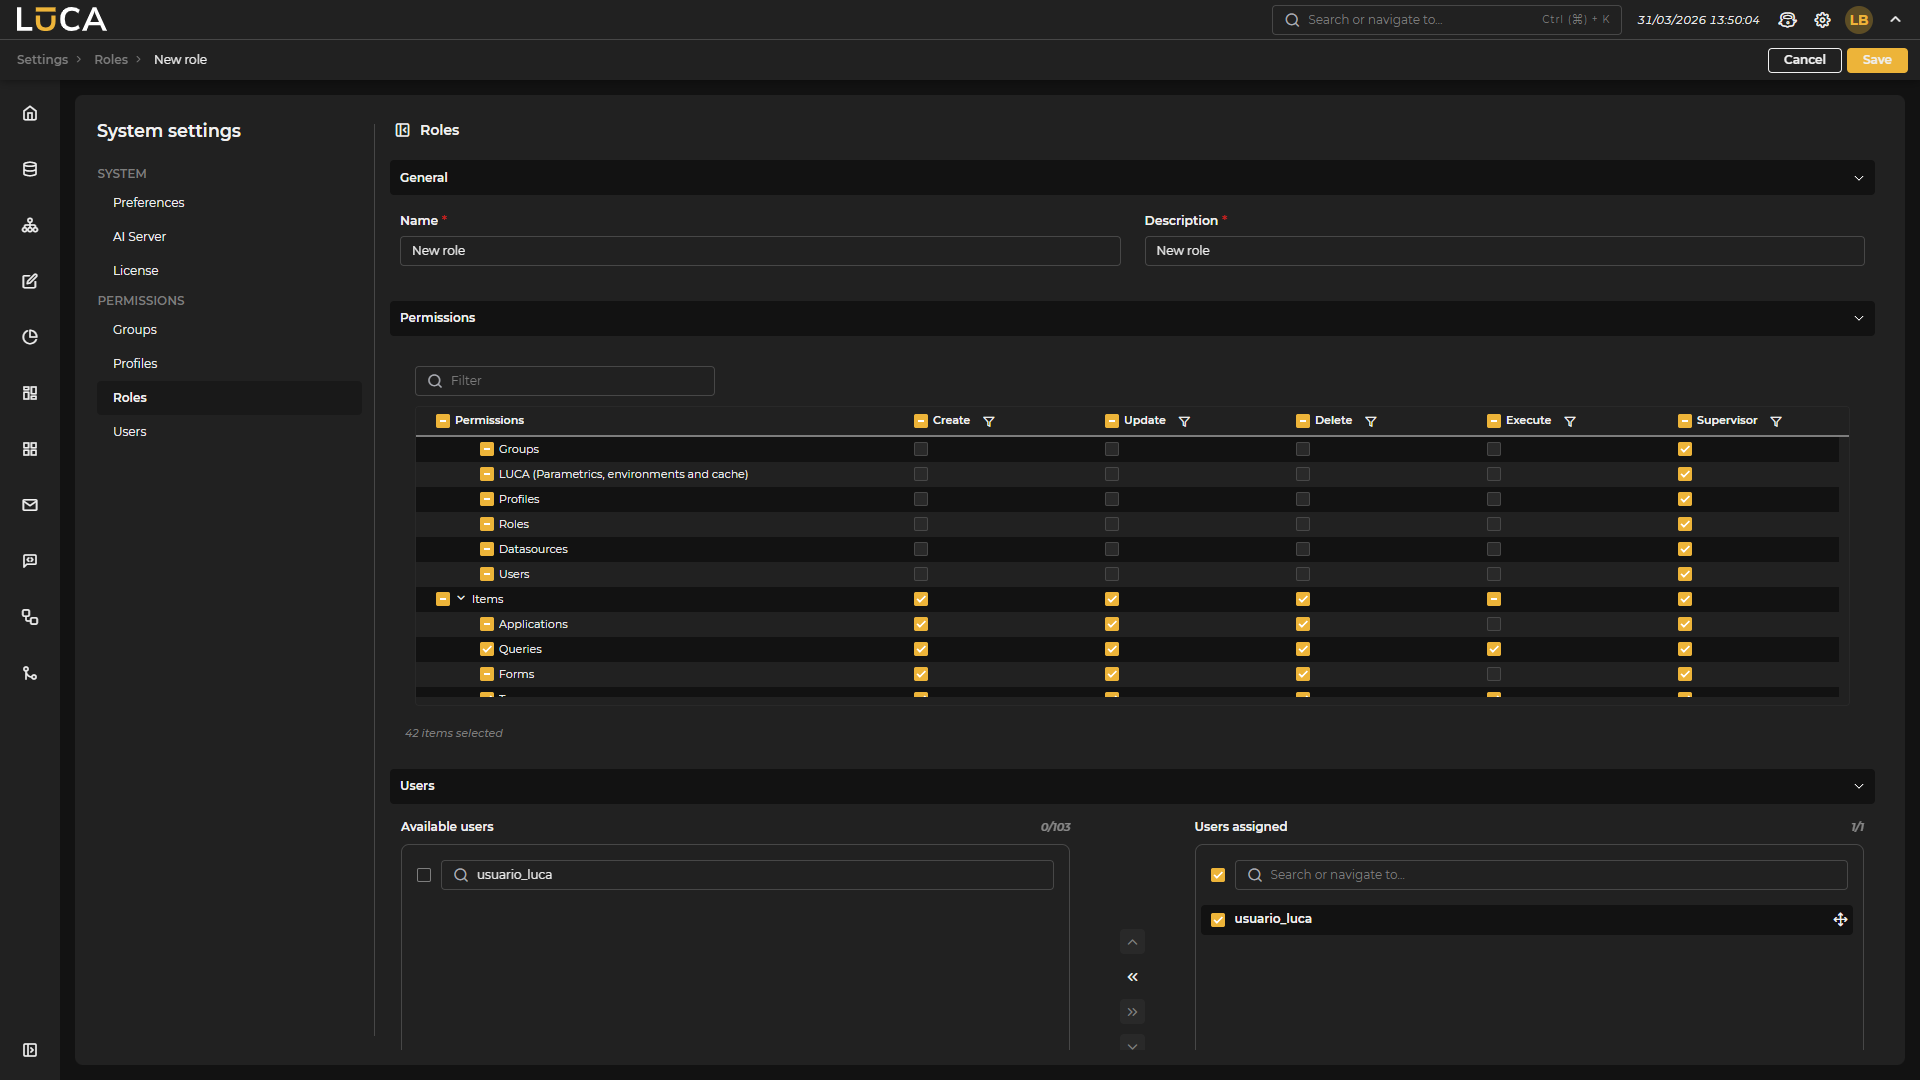 Figure 1.11: New Role
To create a role, a Name and Description are assigned, and the desired permissions are selected in the Permissions table, which groups them by categories (Administration, Elements, and Extras). Each row of the table represents an element, and the columns indicate the possible actions: Create, Update, Delete, Execute, and Supervisor.
In the Users section of the same form, users can be directly assigned to the role, without the need to do it through a profile.
Users
Accessing LUCA requires a username and password. Users have three levels of security associated:
- Permissions: actions they can perform within the application (create, edit, delete, execute, etc.).
- Datasources: connection data that they have access to.
- Groups: folders where the LUCA elements they can view or edit are stored.
These three levels cover access, ensuring that each user only sees what has been configured for them.
LUCA uses Single Sign-On as the authentication system. Users can be registered with their own password or come from an external corporate directory (LDAP, Active Directory, or Kerberos).
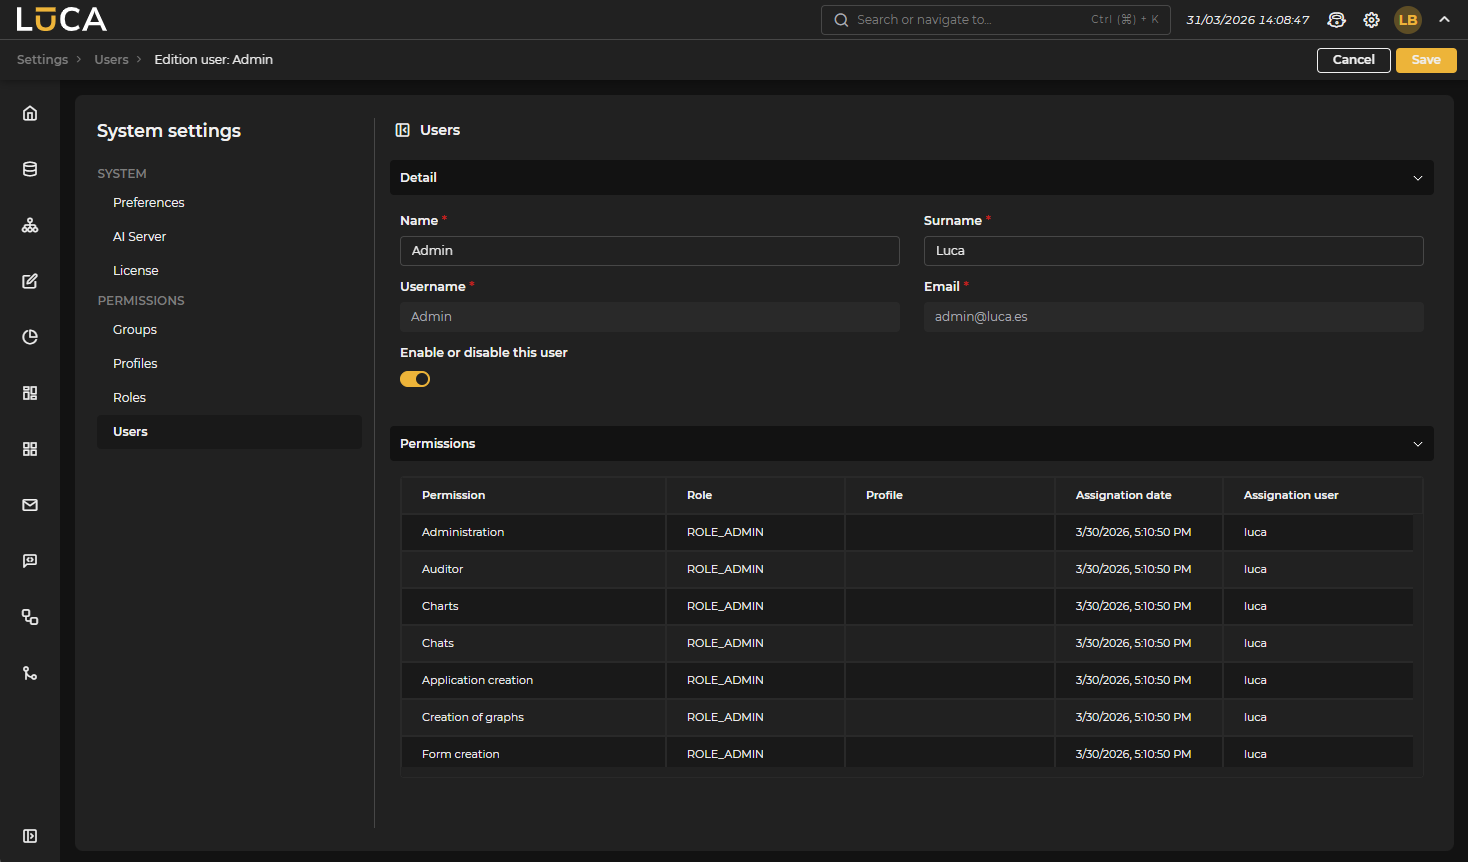 Figure 1.12: User Editing
The list displays each user's name, identifier, email, and their status (Active / Inactive). The eye icon in the top bar displays a quick filter to show active, inactive, or both users.
Creating Users To create a new user, click the + Add button and fill out the form with the fields: First Name, Last Name, Username, Password, Email, and the toggle to enable or disable them.
Importing Users Via the three dots in the top bar, access the Import option, which allows incorporating existing users from the LDAP or corporate directory previously configured in the SSO. The modal displays the list of available users along with the Exists column, which indicates if the user has already been imported. One or more can be selected and confirmed with the Import button.
It is also possible to import service accounts associated with Client Credentials clients registered in Keycloak.
Editing Users When editing a user, their basic information may be modified. The username is never editable; the email is also non-editable if the user comes from an external identity provider. The editing window includes informational tabs with a summary of the permissions, datasources, groups, and applications they have access to.
In LUCA, it is only possible to change one's own password. To modify another user's password, it must be done through the SSO.
Deactivating Users Users in LUCA cannot be deleted, only deactivated. To do this, select the user and hit the delete button. To reactivate them, filter for inactive users using the eye filter and reactivate them from their editing form.