5. Forms
Forms allow for the management of data from datasources: creating, editing, or deleting records from a database.
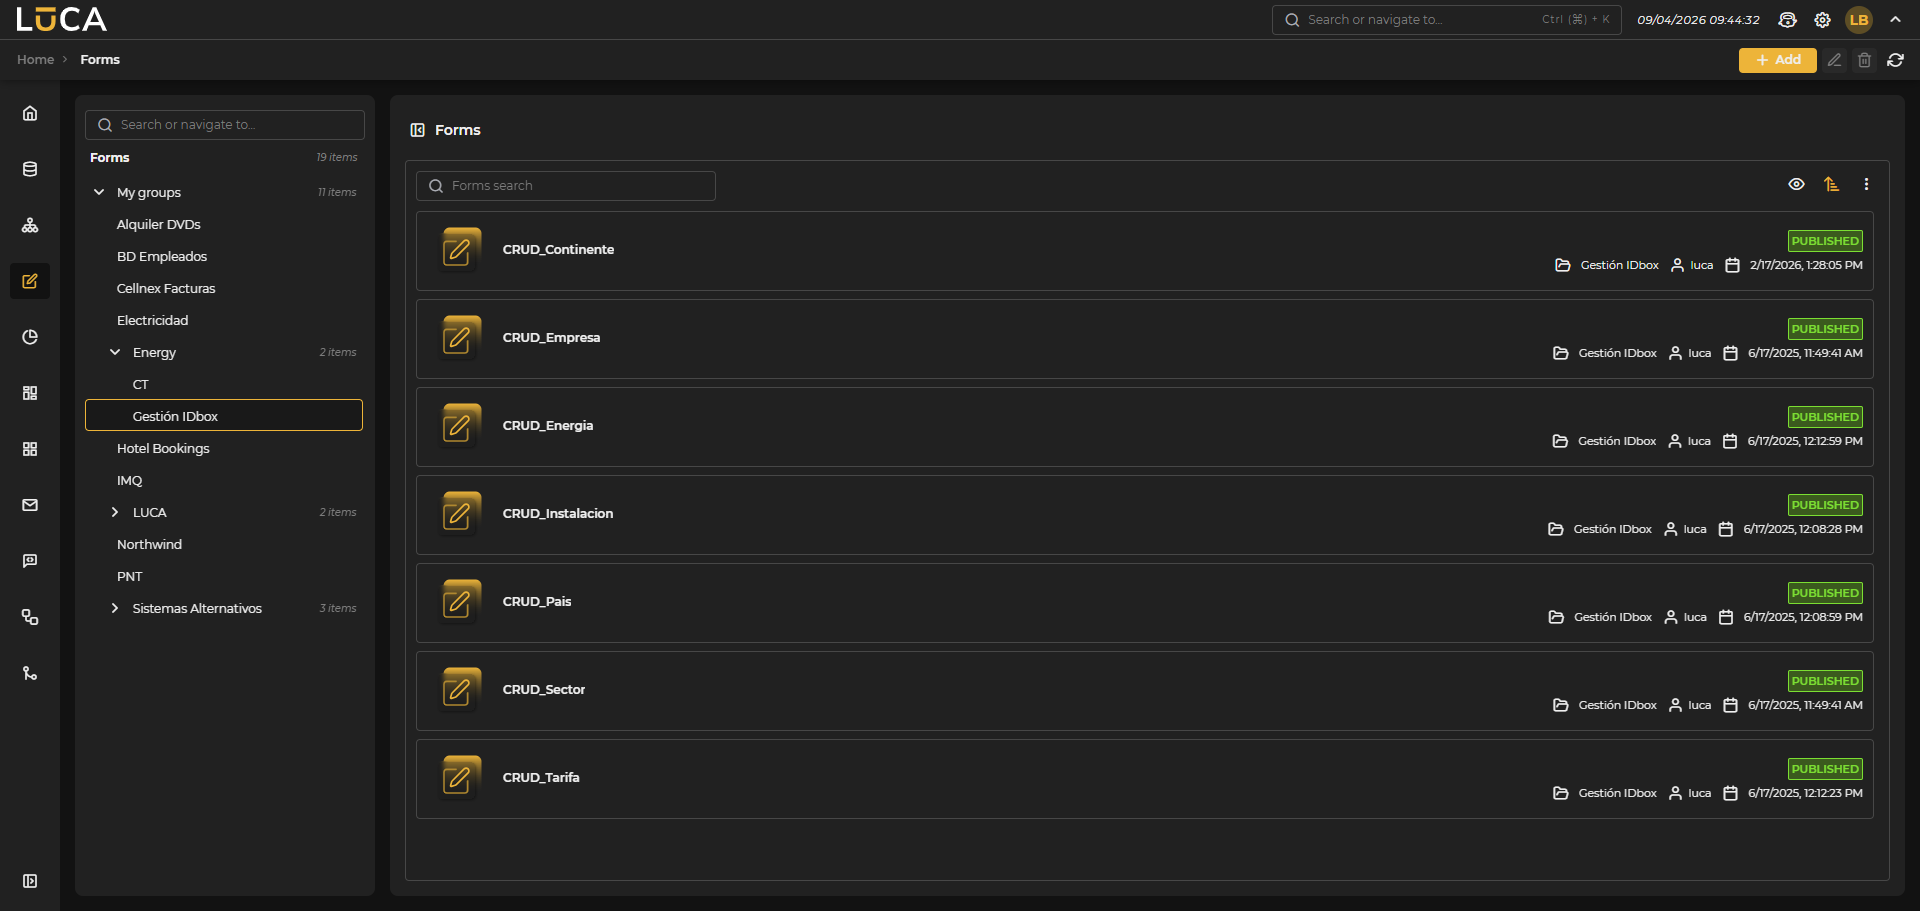 Figure 5.1: Form Management
For more information about the general management screen, see this section.
Creation and Editing of Forms
The form creation view presents the following structure:
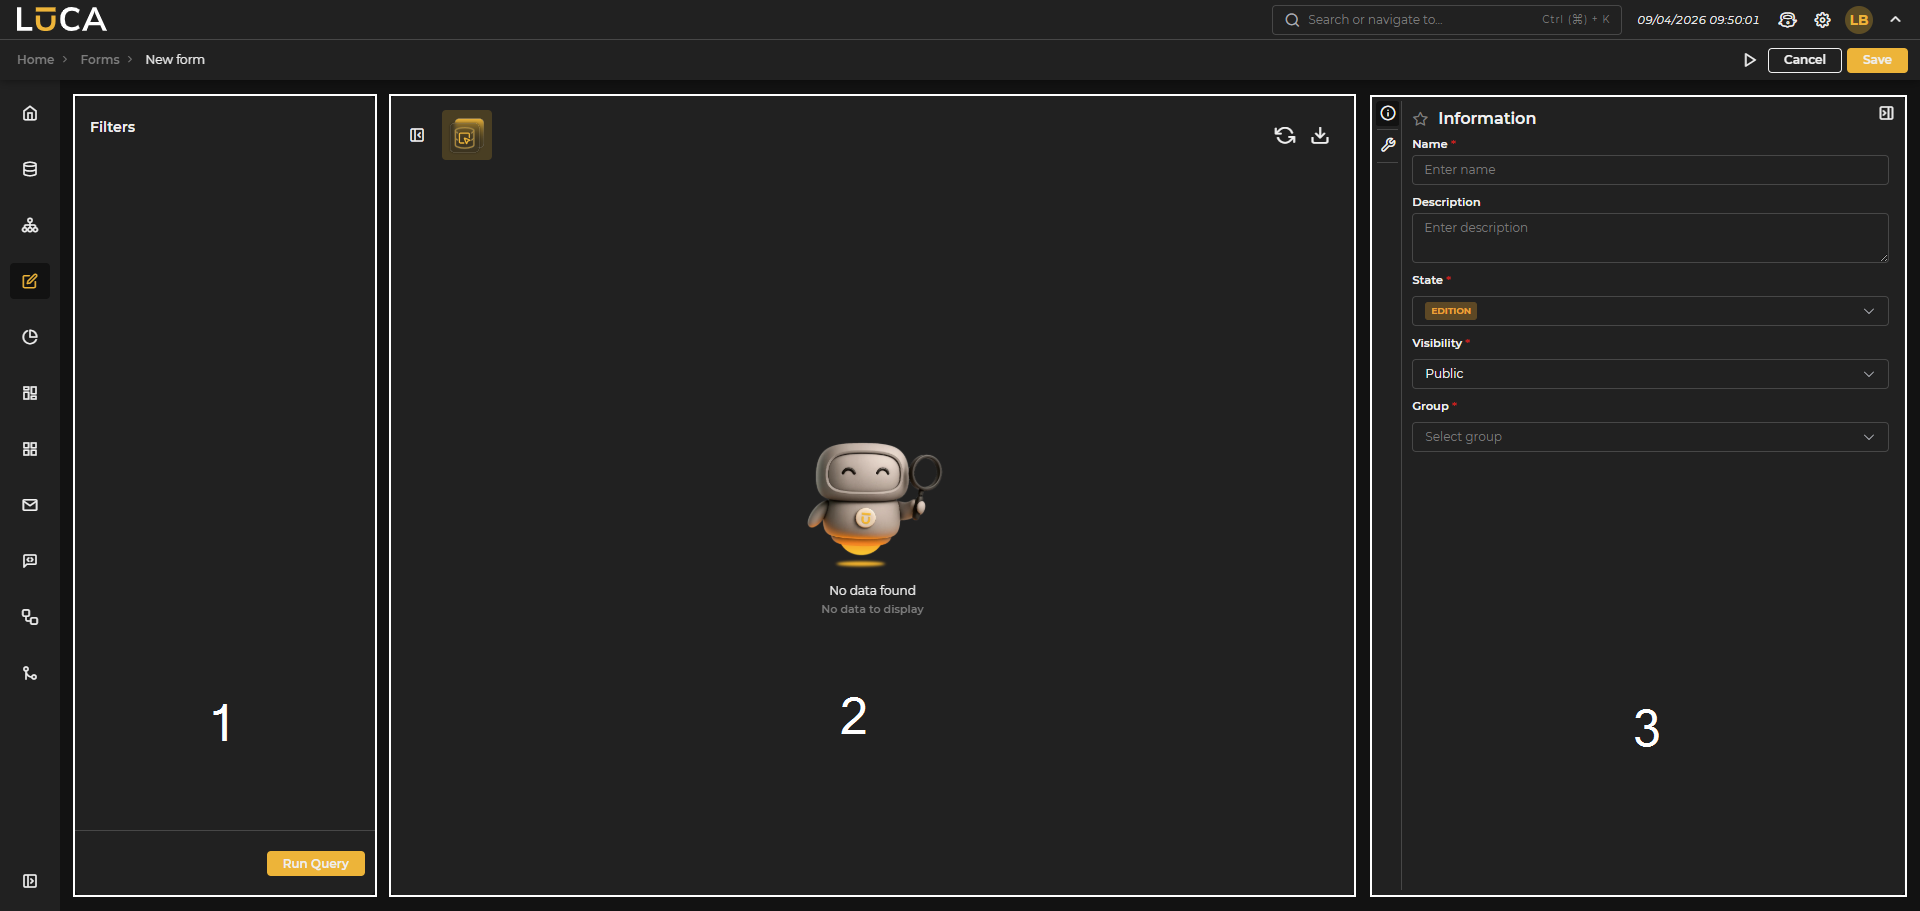 Figure 5.2: Form Creation
Filters and Execution (1): On the left side of the screen are all the filters used by the main query during execution and the execute query button. Results (2): In the central part of the screen, a preview of the form is displayed. Next to the title is the share button, which allows exporting data in different formats (csv and Excel). Configuration (3): On the right side of the screen, the form configuration is located, which is divided into two menus.
In the configuration section, we find the following buttons:
- Execution: Saves and executes the query.
- Cancel: Closes the editor and returns to the query management screen.
- Save: Saves the query information.
Information
This configuration is shared among all elements of LUCA, for more information go to Information Tab.
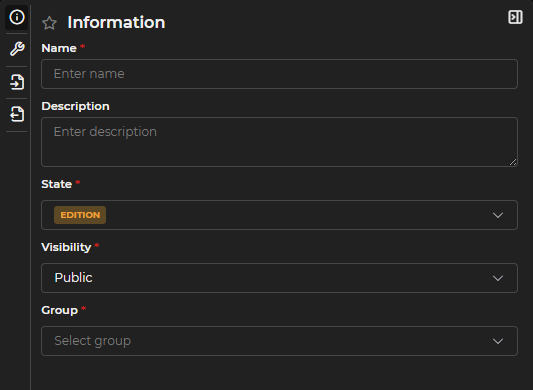
Figure 5.3: Form Information
Configuration
A form consists of up to four queries, of which only the selection query is mandatory. Once the selection query is configured, executing it will display the results in the central panel. As the other queries are configured, the context menu from the right-click will show the corresponding options.
- Selection Query: Displays the records that can be edited, deleted, or inserted.
- Insertion Query: When configured, the option to insert appears in the context menu. Executing it creates a new row in the table with available fields to fill in.
- Update Query: When configured, the option to edit appears in the context menu. Selecting a record in the table and executing the option allows editing it.
- Deletion Query: When configured, the option to delete appears in the context menu. Selecting a record in the table and executing the option allows deleting it.
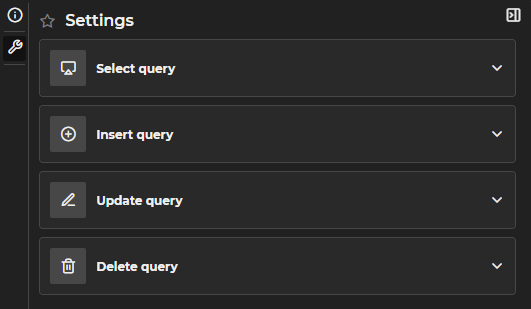
Figure 5.4: Form with Four Configured Queries
Update and deletion queries require variable link configuration:
- Update Query: A table is presented to perform the links. On the left, in Input Variables, the variables created in the update query appear. On the right, in Linked Variable, a combo box with the output variables of the select query appears. You must select which output variable from the combo is linked with each input variable so that the data from the select is passed to the update.
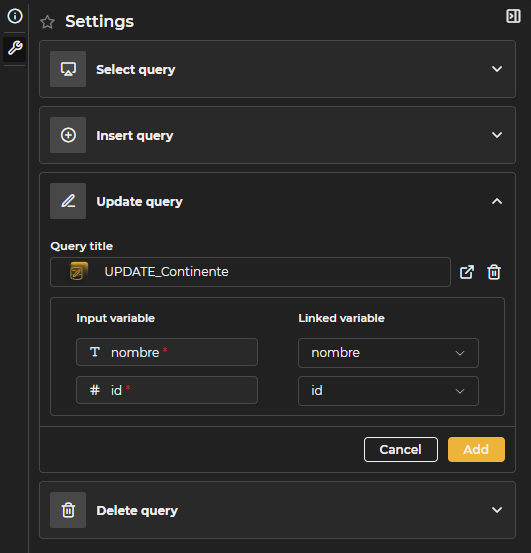
Figure 5.5: Update Query
- Deletion Query: The output variables from the select are linked with the input variables of the delete query. It is recommended to use an input variable in the delete that unequivocally identifies the record.
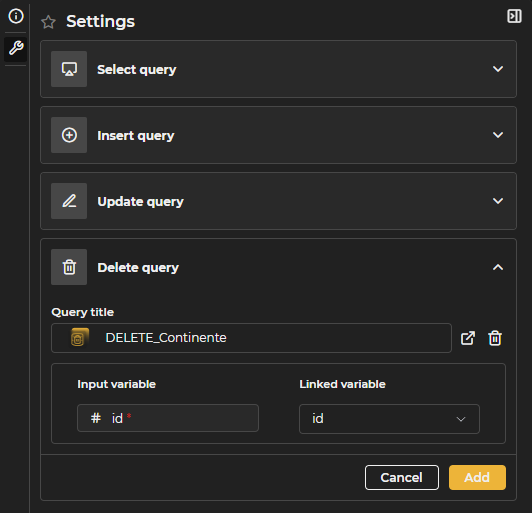
Figure 5.6: Deletion Query
To configure each of the four possible queries, click on the corresponding option and select the desired query using the search field. The field allows searching by typing or selecting directly from the dropdown list. To save the changes, click Add, or Cancel to discard them. To change an already configured query, repeat the same process. The trash can icon allows deleting the configured query, and the arrow icon opens the query in a new editing window.
Execution of a Form
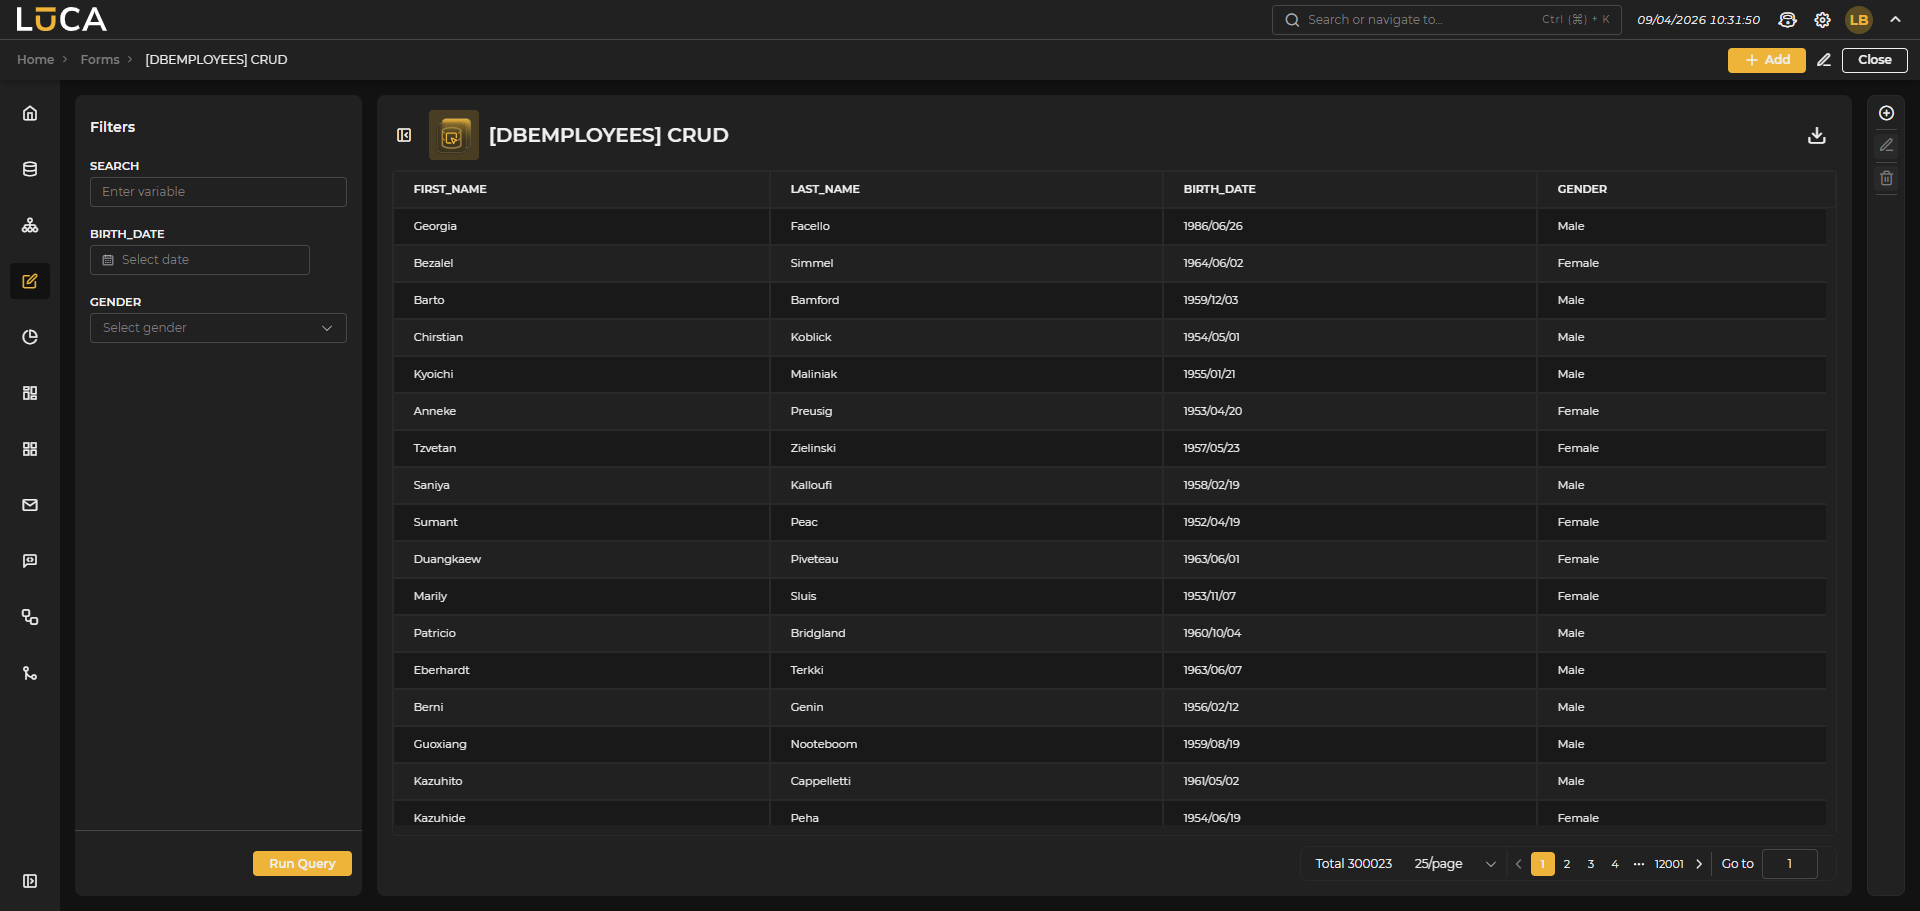 Figure 5.7: Execution of a Form
When executing a form, the execution of the configured selection query is displayed. If insertion, update, and deletion queries have been configured, their options are available on the right margin of the screen and in the context menu when selecting a record.
To add, edit, or delete a record, click the corresponding button, fill in the desired fields, and click Insert, Update, or Delete respectively.
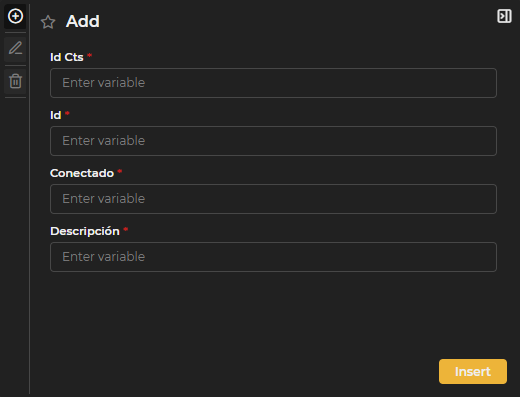
Figure 5.8: Insertion, Update, and Deletion.
Using the context menu, the insertion and update options allow editing fields directly in the table. Upon finishing editing, the save or cancel buttons located next to the export button must be used. The deletion option only displays a confirmation window.
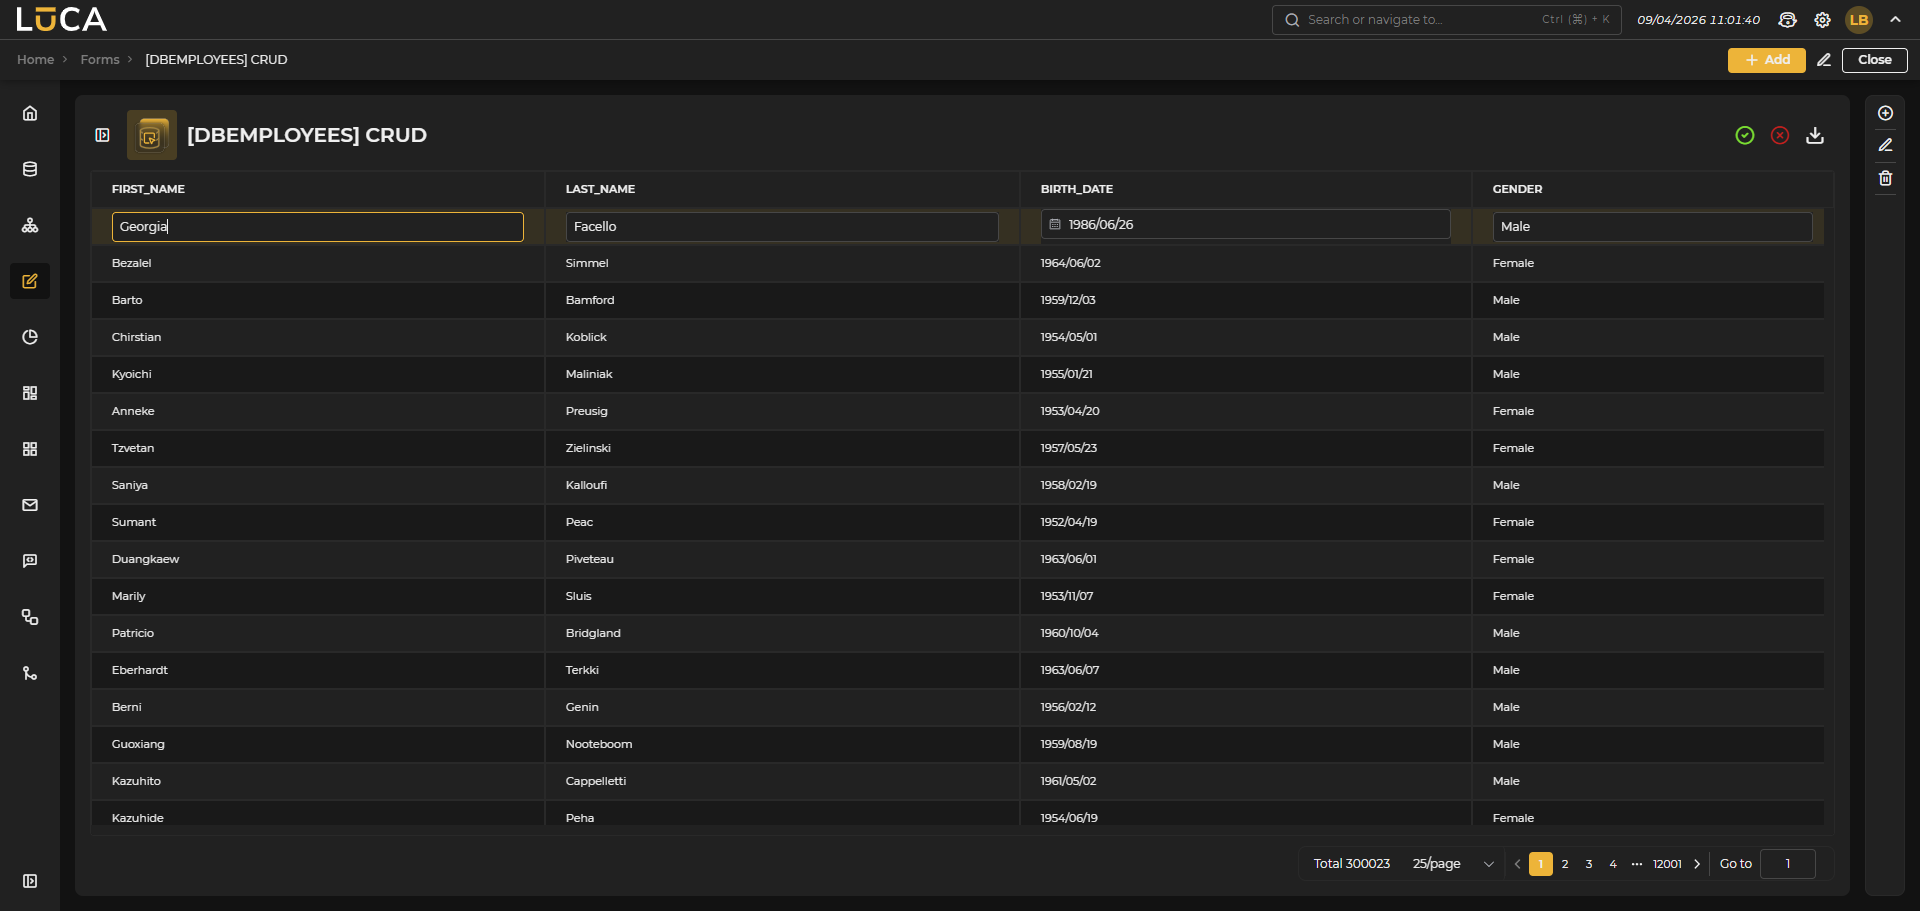 Figure 5.9: Editing with Context Menu.